Features
This page contains feature descriptions of Entities and Custom Entities.
Attachments
Entity Custom Entity
You can attach files to (Custom) Entities for other users to download. To upload an attachment:
- Open the (Custom) Entity.
- Click Edit in the upper left corner of the Entity. The Entity settings open.
- In the Properties section, enable Attachments. The Attachments tab is added to the Entity.
- Open the Attachments tab.
- Click [Add]. The window "Add attachment" opens.
- Click [Select a file] and navigate to your local file or drag and drop a local file into the browser window.
- Optional: Add a comment about the content of the file.
- Click [Add]. The window "Add attachment" closes.
- Optional: Upload more files following steps 5 to 8.
- Click Publish to update the Entity.
The attached files are available for download in the Attachment tab of the (Custom) Entity.
Data Products
Entity Custom Entity
You can label (Custom) Entities as Data Products to restrict users to selected Entities that focus on the information that is relevant to their work. To label an Entity as a Data Product:
- Open the Entity you want to label.
- Click Edit in the upper left corner of the Entity. The Entity settings open.
- In the Properties section, enable Data Product.
- Click Publish to update the Entity.
Enterprise Glossary lists the Entity in the Data Products menu.
For more information, see Data Products.
Linked Entities
Entity Custom Entity
You can link (Custom) Entities together to maintain relations between Entities. To add a link to another Entity or Custom Entity:
- Open the (Custom) Entity.
- Click Edit in the upper left corner of the Entity. The Entity settings open.
- In the Properties section, enable Linked Entities. The Linked Entities tab is added to the Entity.
- Click [Add]. The window "Select Entity" opens.
- Select all Entities and Custom Entities you want to link to.
- Click [OK]. The window "Select Entity" closes.
- Optional: in the Linked Entities tab, change the relation and / or write a description about how the Entities are related using the Relation and Description column of the linked Entities. For more information, see Stitching.
- Click Publish to update the Entity.
The linked Entities are listed in the Linked Entities tab of the (Custom) Entity.
Stitching
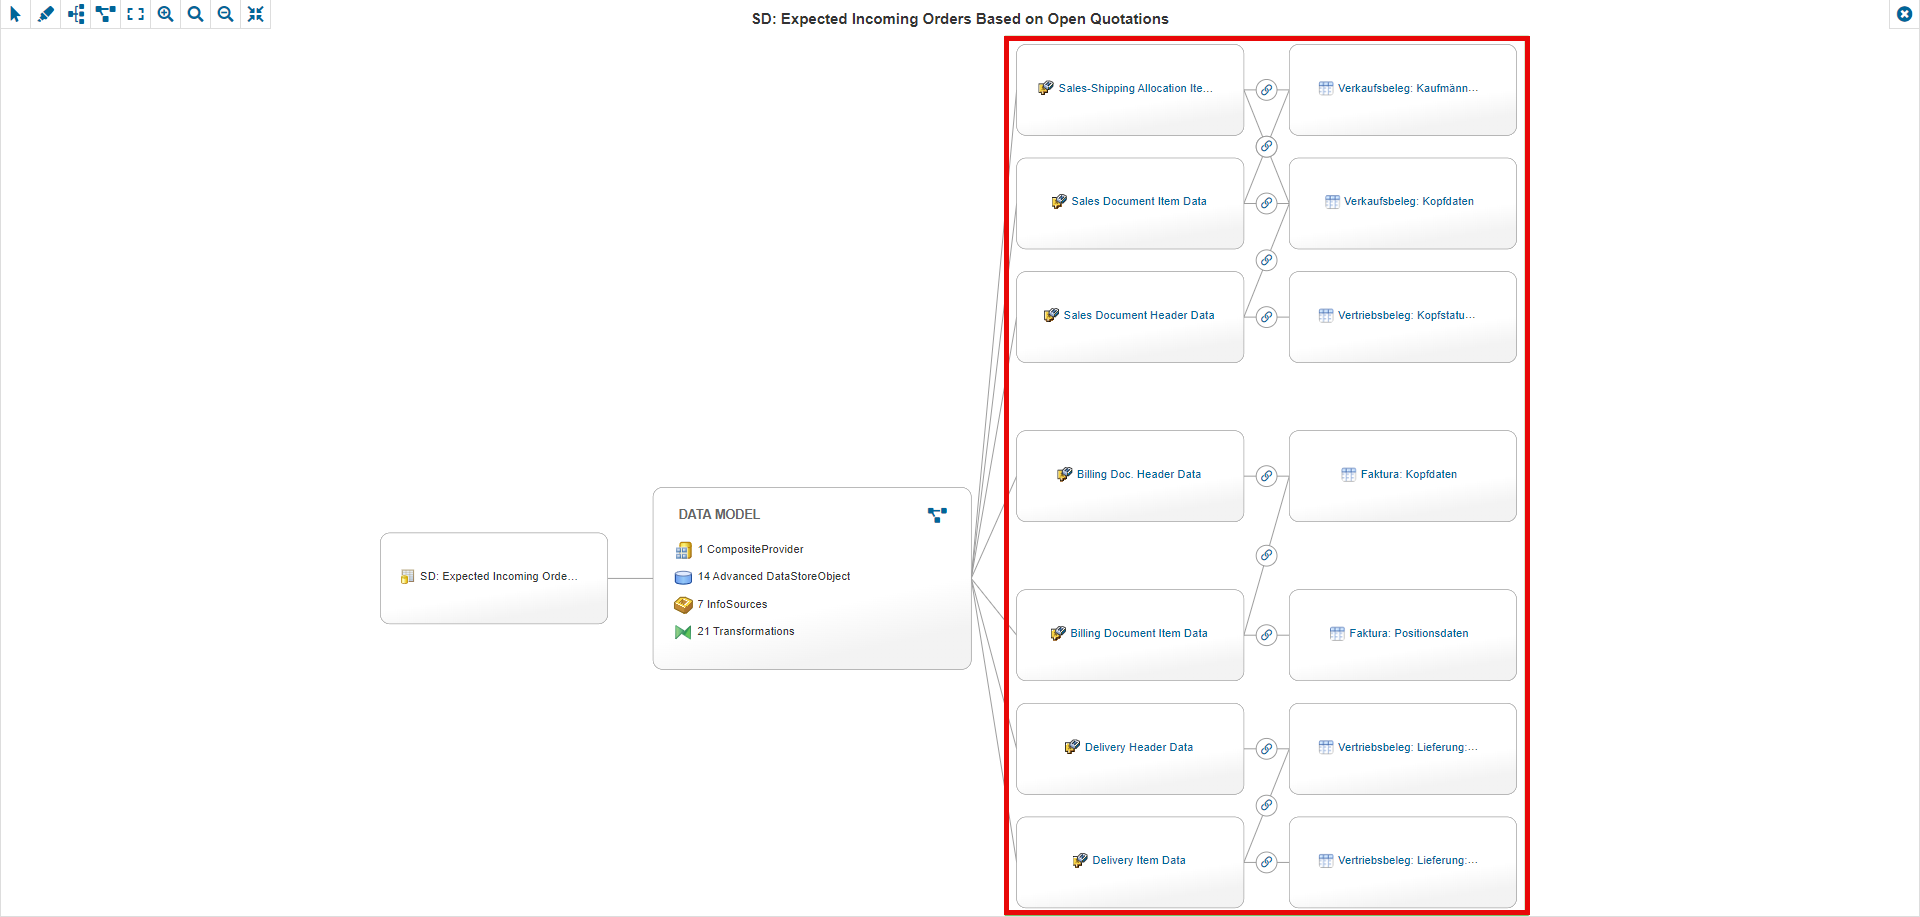
You can manually stitch object lineage trees together by linking Entities with Source or Target relation types. Source and target Entities are automatically included in the Object Lineage tab of related Entities. This allows you to connect object lineage trees when the connection cannot be made automatically. Example:
Discussions
Entity Custom Entity
You can discuss (Custom) Entities with other users by commenting and replying to other comments. Administrators can:
- Enable and disable discussions in the Entity Settings.
- Enable and disable the Like function for discussion comments in the Entity Settings.
To start a discussion:
- Open the (Custom) Entity.
- Click Discussions at the bottom left corner of the Entity. The discussion section opens.
- If there are other discussions, click [New Discussion].
- Enter a comment or question and click [Post].
Your comment is visible to other users and other users can reply.
Once a discussion is started, users can:
- Click [Reply] to respond to an existing comment.
- Hover over a comment to:
- like it by clicking the thumbs up icon ().
- watch the discussion by clicking the eye icon ().
- edit the comment by clicking the pen icon ().
- delete your own comment by clicking the delete icon ().
Versioning
Entity Custom Entity
You can track changes to (Custom) Entities across multiple versions. New versions are created automatically when:
- The Entity is first created (identifier Initial Version).
- New metadata is synchronized (identifier SAP).
- Changes are made to the template the Entity is based on (identifier Template).
- A user manually edits the Entity (identifier Manual).
Administrators can:
- Restrict the number of versions in the cleanup settings.
- Enable and disable comments in the Entity Settings.
To view the Entity version history:
- Open the (Custom) Entity
- Click Versions at the bottom left corner of the Entity. The history section opens and shows:
- all previous versions.
- the date each version was created
- who created the version
- what caused the new version
- comments that were added when publishing the version
- Click any version to view it in the main window of the Entity. The version number is displayed in the upper right corner of the Entity.
The previous version of the (Custom) Entity is displayed.
Print View
Entity Custom Entity
You can print or export the content of (Custom) Entities to a PDF file. To print or export the Entity:
- Open the (Custom) Entity.
- Click Print View. A print preview opens in a new window.
- Select if the print should includes tooltips and information about linked Entities.
- Click [Print] to save or print the Entity as a PDF.
- Select the following options as needed:
- Print tooltips of Fields.
- Print linked Entities.
- Specify how to represent object names (description, technical name, both, etc.).
- Click [Print] to save or print the Entity as a PDF.
The (Custom) Entity is printed or saved as a PDF file.
Favorites
Entity Custom Entity
You can mark (Custom) Entities as favorites to access them later. To mark Entities as a favorite:
- Open the (Custom) Entity.
- Click Favorite in the upper left corner of the Entity.
The Entity is listed in the Favorites section of the Home screen.
Quick Info
Entity
You can add short descriptions or comments to Entities. This quick info is displayed in multiple places:
- In the Quick info field of an Entity.
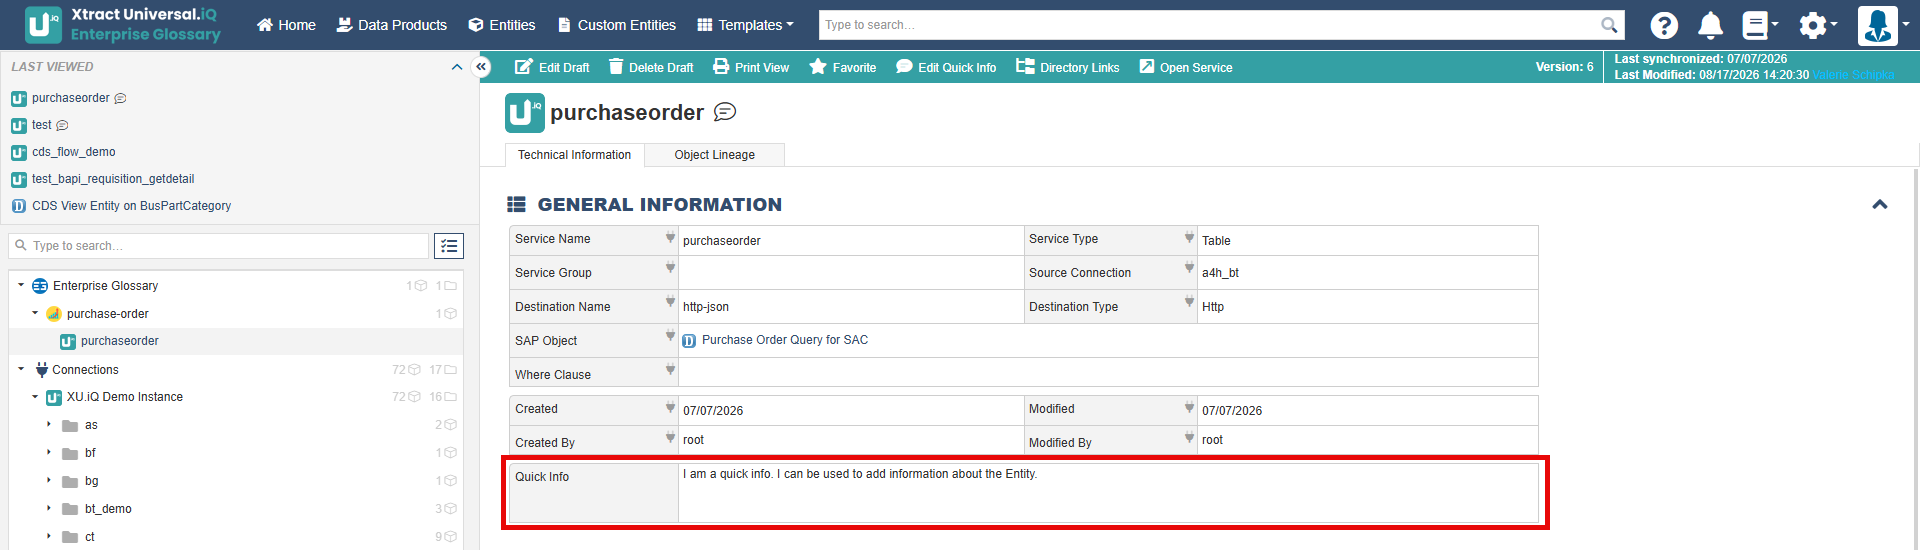
- As a tooltip next to the name of an Entities. This speech bubble icon () and its tooltip are available displayed in all places the Entity is displayed, e.g., in the Where-Used Fields of another Entity.
- In the Quick info column of the Entities overview.

To write or edit a quick info either:
- open the Entity and click Edit Quick Info in the upper left corner of the Entity.
- open the Entities menu in the navigation bar and click the speech bubble icon () in the Actions column of the Entity .
- add quick infos to multiple Entities using the Mass Edit button in the Entities overview .

Directory Links
Entity Custom Entity
You can view a list of folders that link to an Entity. To show the list, open the (Custom) Entity and click Directory Links.
Open Service / Data Preview
Entity
You can directly access the original object of an Entity inside the source system. Example: you can open the Xtract Universal.iQ service an Entity is based on directly from within Enterprise Glossary.
To use that functionality the HTTPS port in the source connection must be maintained.
To open the object inside the source system, open the Entity and click Open Service or Data Preview.