Custom Fields
This page shows how to use Custom Fields in Enterprise Glossary.
Custom Fields can be used in templates to add additional, organization-specific information to an Entity.
Maintain Custom Fields
Create Custom Fields
Only authors can create Custom Fields. To create a Custom Field:
- In the navigation bar, go to Templates > Custom Fields. A list of existing Custom Fields opens.
- Click Create. The Custom Field settings opens.
- Enter a unique name for the Field and configure the Field settings.
- Define the content type, default value or values, and layout, see Custom Field Settings.
- Click [Create].
The new Custom Field is added to the list of Custom Fields and is available to use in templates.
Edit Custom Fields
To edit existing Custom Fields:
- In the navigation bar, go to Templates > Custom Fields. A list of existing Custom Fields opens.
- Choose the Custom Field you want to modify.
- Click pen icon () in the Actions column of the Field. The Custom Field settings opens.
- Make changes to the Field settings, see Custom Field Settings.
- Click [Save].
The Custom Field is updated.
Copy Custom Fields
To copy existing Custom Fields:
- In the navigation bar, go to Templates > Custom Fields. A list of existing Custom Fields opens.
- Choose the Custom Field you want to copy.
- Click the copy icon () in the Actions column of the Custom Field. A popup window opens.
- Enter a unique name for the copied Custom Field.
- Click [Clone].
The copy is added to the list of Custom Fields.
Delete Custom Fields
A Custom Field can only be deleted if it is not used in a template. To delete existing Custom Fields:
- In the navigation bar, go to Templates > Custom Fields. A list of existing Custom Fields opens.
- Choose the Custom Field you want to delete.
- Click the delete icon () in the Actions column of the Custom Field. A popup window opens.
- Click [Yes].
The Custom Field is removed from the list.
Custom Field Settings
When creating a new Custom Field or editing an existing one, you can edit the following sections:
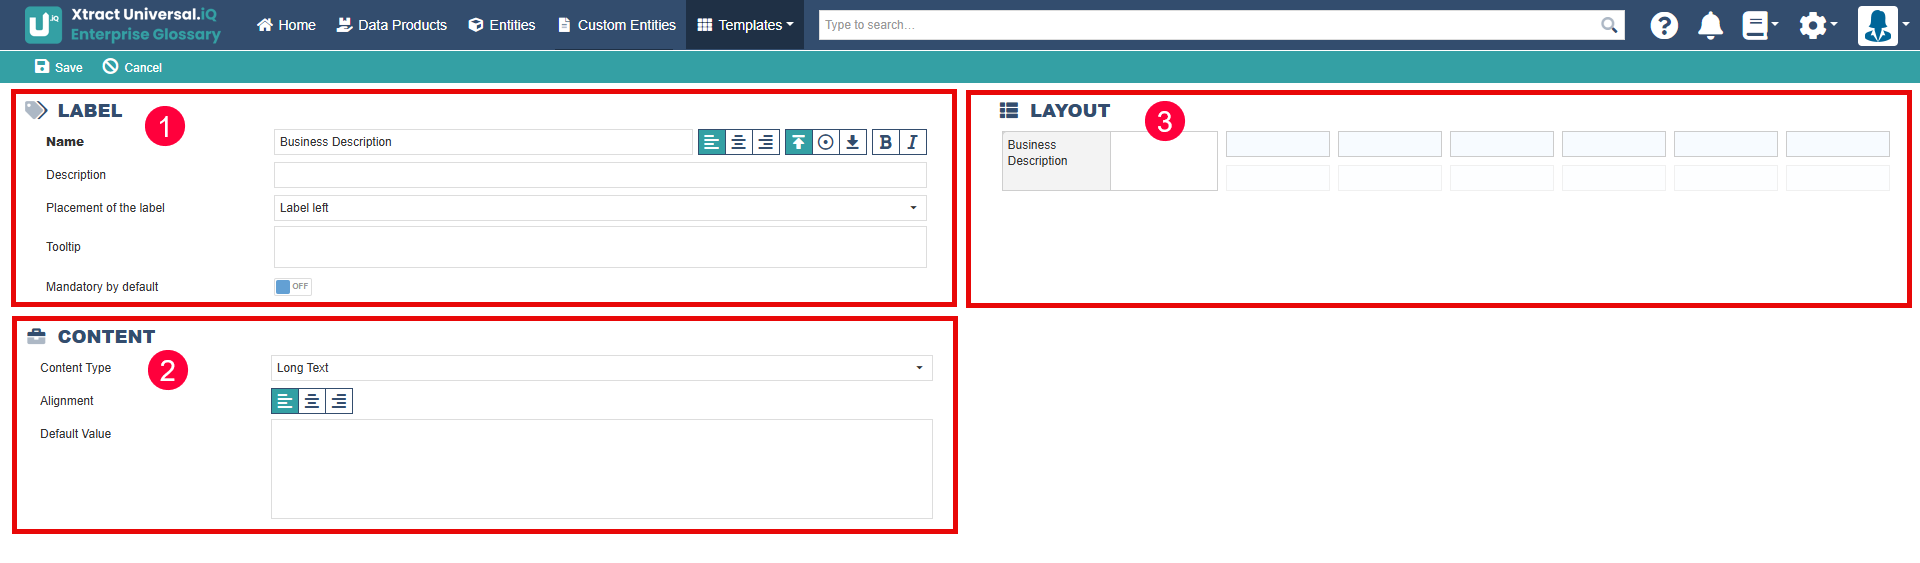
Label
The following settings define the how the label of the Custom Field is displayed in an Entity:
- Name: Enter a unique name for the Custom Field and select the alignment of the label relative to the field.
- Description: Provide additional information about the Custom Field’s purpose.
- Placement of the label: Choose whether the label appears left of the field or above it.
- Tooltip: Add a tooltip that helps users understand the Custom Field.
- Mandatory: Set the Custom Field to mandatory if users must enter a value.
Content
The following settings define the content of the Custom Field:
- Content Type: Select the type of content the Custom Field should accept.
- Text: Allows unformatted text in a single line.
- Long Text: Allows text in multiple lines and keeps the field at least two lines high for longer entries.
- Drop-down List: Lets users choose one predefined value from a list.
- Token Box: Lets users select multiple predefined values from a list.
- Checkbox: Lets users select multiple predefined values while keeping all options visible.
- Radio Button: Lets users choose one predefined value while seeing all options.
- Date and Time: Lets users select a date and optionally a time.
- User Selection: Lets users select one or more users from the Enterprise Glossary.
- Rich Text: Lets users enter formatted text, links, and images.
- Alignment: Select how the content is aligned within the field.
- Default Value / Values: Enter a default value or define the selectable values for the Custom Field.
Layout
Choose the default width of the Custom Field. change the size of a Custom Field by dragging the edges to the desired height or width.