Create a Client PSE to connect to SAP Cloud Systems
The following article shows how to create a client PSE (Personal Security Environment) that can be used to connect to SAP cloud systems via WebSocket RFC.
Prerequisites
- SAP Cloud API URL, e.g.,
https://my123456-api.s4hana.ondemand.com. - Download the SAP Cryptographic Library (sapgenpse and libsapcrypto.so) from the SAP Service Marketplace.
Create a Client PSE
To create a client PSE file that trusts the server certificate of the SAP cloud system:
- Enter the SAP Cloud API URL in a browser of your choice.
-
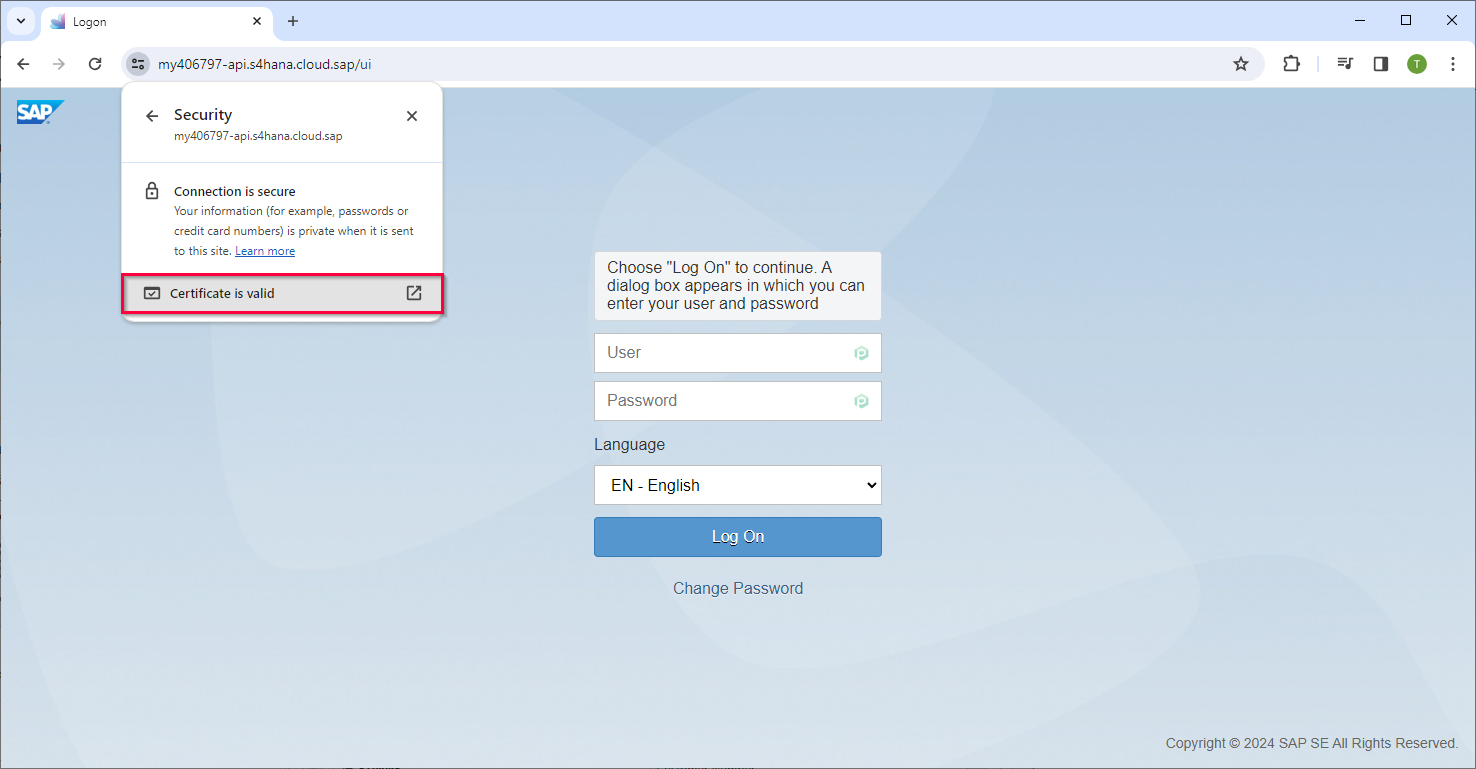
View the certificate in the browser.
Navigate to View site information > Connection is secure > Certificate is valid.
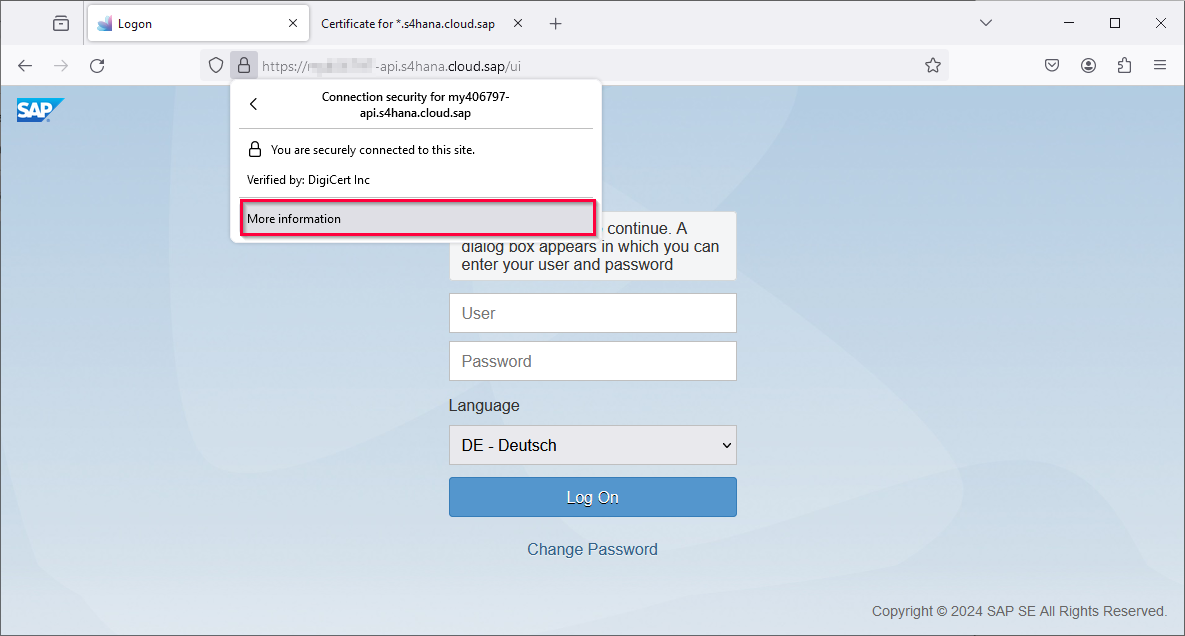
Click the pad lock icon left of the URL, navigate to Connection secure > More information, then click [View Certificate].
-
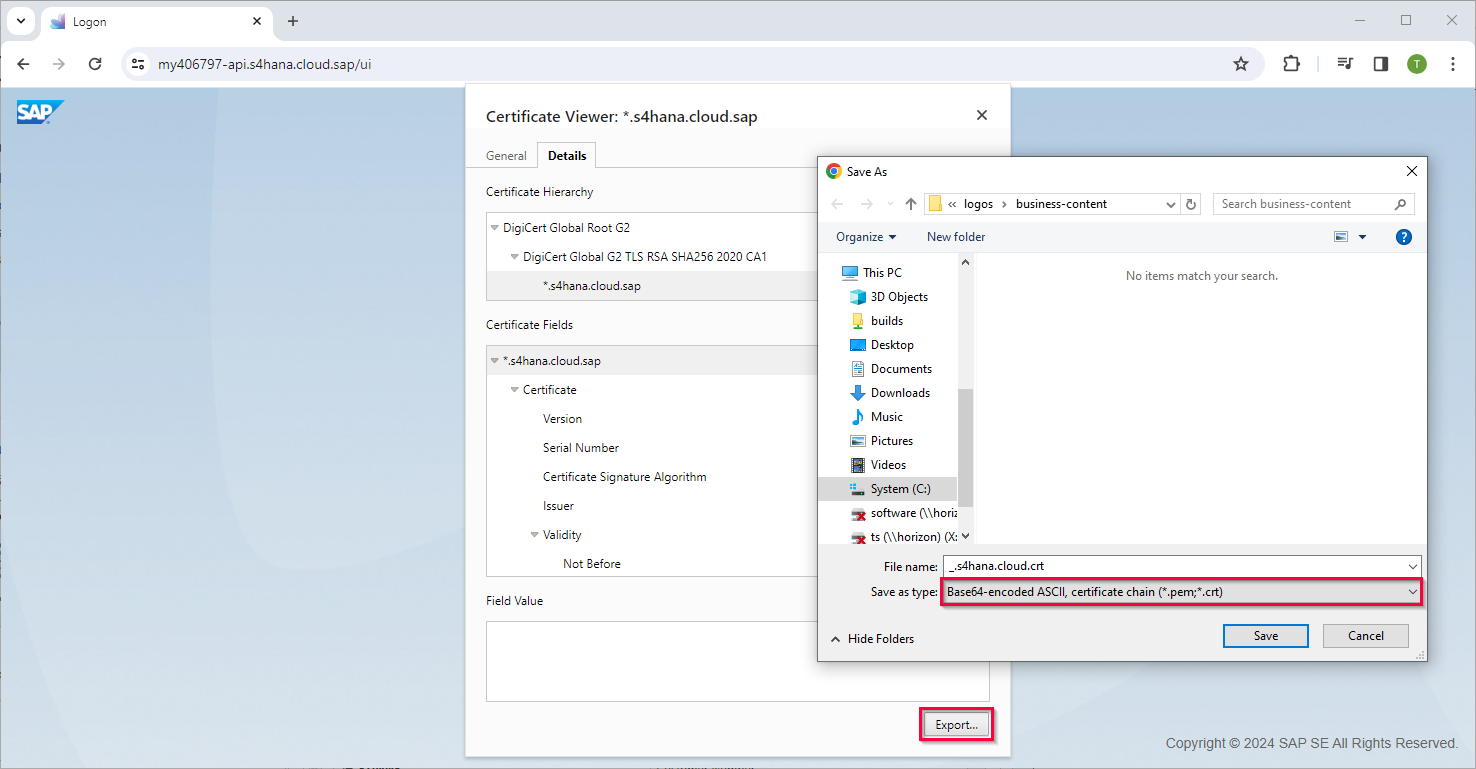
Download the certificate chain from the browser. The certificate chain contains all certificates that are signed by the server certificate.
Open the Details tab and click [Export...].
Make sure to save the file in the format Base64-encoded ASCII, certificate chain (*.pem;*.crt).
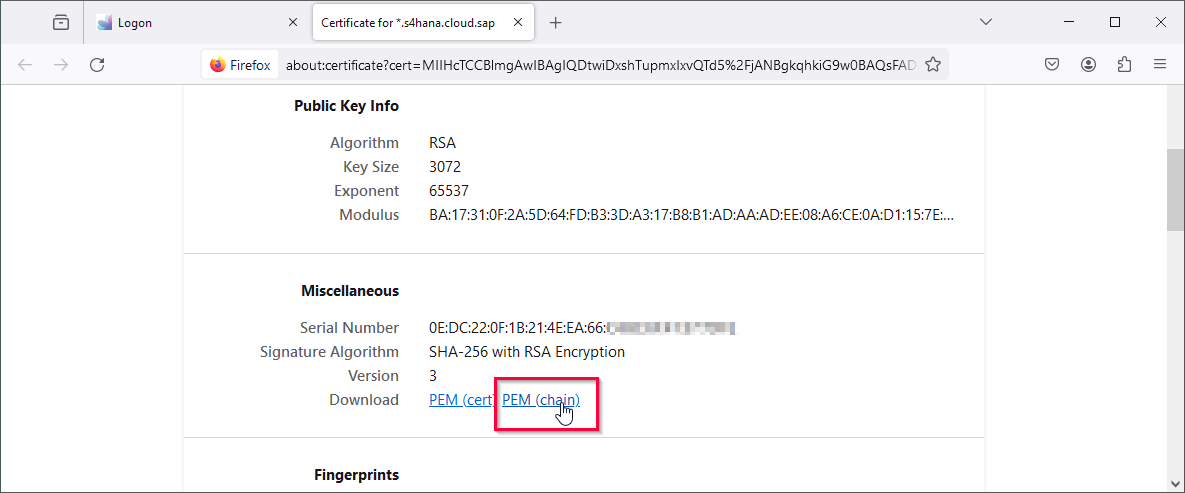
Scroll to the Miscellaneous section of the certificate and in the download row, click PEM (chain).
-
Use the sapgenpse command line tool to create a client PSE file:
- Replace
[Distinguished name]with the distinguished name of the server that runs Xtract Universal.iQ, e.g.,"CN=COMPUTER.example, C=DE, S=BW, O=TS, OU=DEV". - Optionally, replace
client.psewith a custom filename for the .pse file. - The tool creates its own repository in a standard path, unless the path is changed by the environment variable SECUDIR or by specifying an absolute path.
Warning
Restricted Access
The PSE must be created without a password/pin, otherwise reading is not possible. Make sure not to secure the PSE. - Replace
-
Use the following command to add the certificate chain from step 3 to the client PSE:
Replace
[chain.pem]with the name of the downloaded .pem file, e.g.,s4hana-cloud-sap-chain.pem. For more information on how to use the sapgenpse.exe, run the commandsapgenpse -h.
The .pse file can now be used to connect Xtract Universal.iQ to the SAP cloud.
Add the Client PSE to the Xtract Universal.iQ Container
Move the PSE file to the input/pse/ directory inside the volume used by the Xtract Universal.iQ container, see Container Directories.
Related Topics
Written by: Valerie Schipka, Markus Eckert