Integrate a Service with Nintex
The following article shows how to integrate an Xtract Universal.iQ service with Nintex Automation Cloud.
The Nintex Automation Cloud is a cloud-based process automation service provided by Nintex. The platform can be used to create automated workflows between different cloud apps and services that synchronize and collect data, generates documents and more. For more Information on Nintex, see Nintex Official Website.
Note
When integrating services from a local Xtract Universal.iQ installation with the Nintex Automation Cloud, we recommend using the Nintex Gateway to tunnel the connection.
Setup in Xtract Universal.iQ
Before integrating Xtract Universal.iQ with third-party tools:
- Create a service in Xtract Universal.iQ. For this example we use the BAPI SD_RFC_CUSTOMER_GET to search and extract customer data from SAP. The service has the following settings:
- Set the Import Parameter NAME1 to Supplied by Caller.
- Select all fields in the Table CUSTOMER_T for the output.
- Testrun the service in Xtract Universal.iQ to make sure it works, see Documentation: Run Services in Xtract Universal.iQ.
- Click [ Run > Service > Copy URL] to copy the service URL to your clipboard.
The service definition can now be used to integrate the service with third-party tools.
Configure an Xtension in Nintex
To use Xtract Universal.iQ services in the Nintex Automation Cloud:
- Open your Nintex Automation Cloud tenancy.
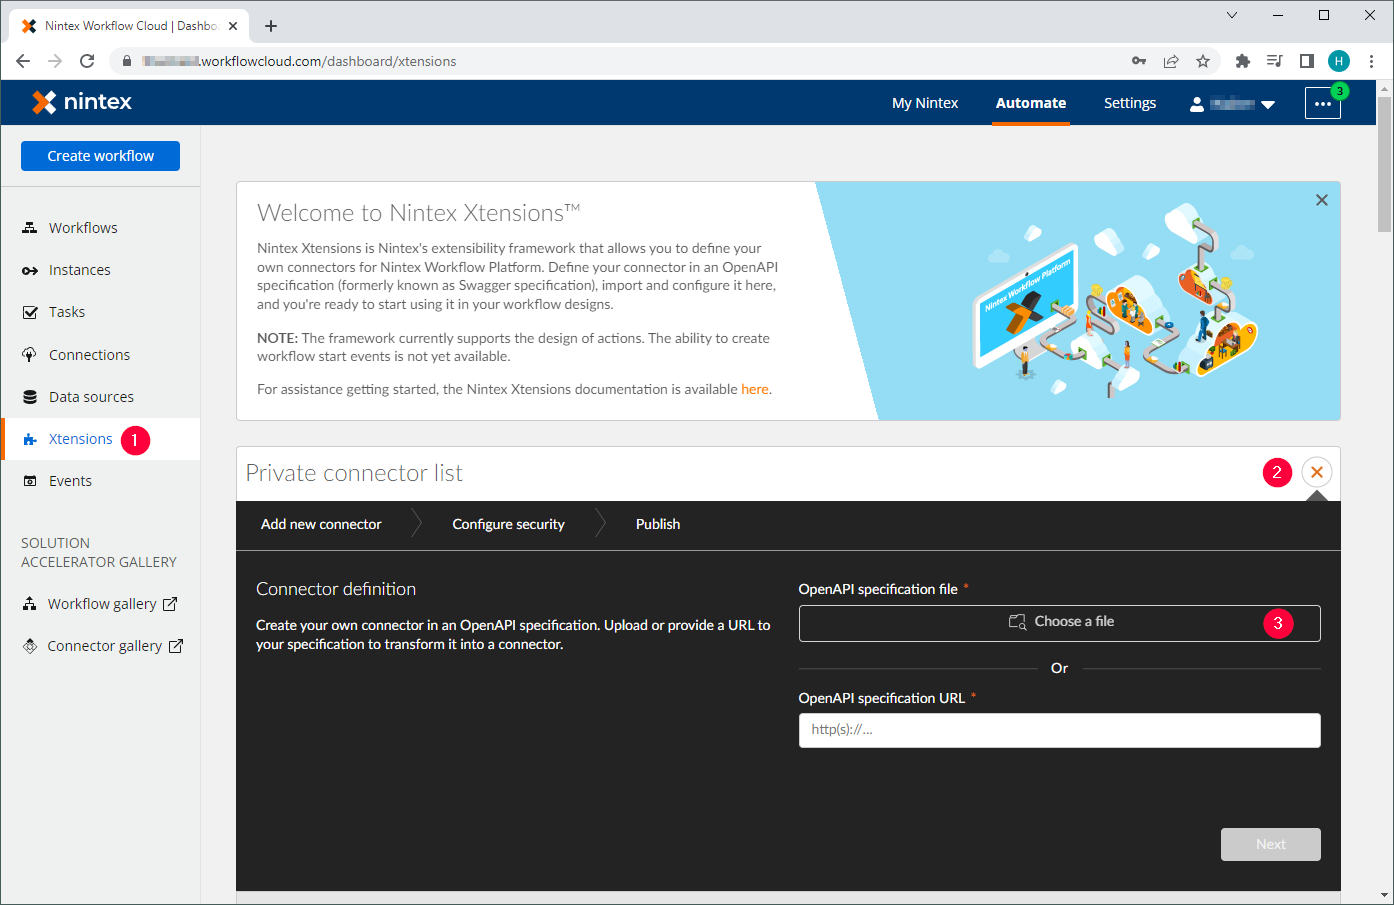
- Click Xtensions in the dashboard to open the Xtensions page .
- Click
 in the Private connector list .
 - Click [Choose a file] . Navigate to the Xtract Universal.iQ service definition from Setup in Xtract Universal.iQ.
- Wait for the Nintex Automation Cloud to validate the file.
- Click [Next]. Nintex Workflow Cloud detects the basic authentication security template.
- Click [Next].
- Edit the Name of the Xtension. The entered name becomes the name of the action group in the workflow.
- Edit the Description of the Xtension. This appears in the Private connector list in the Xtensions page.
- Optional: select or upload an icon for the Xtension.
- Click [Publish] .
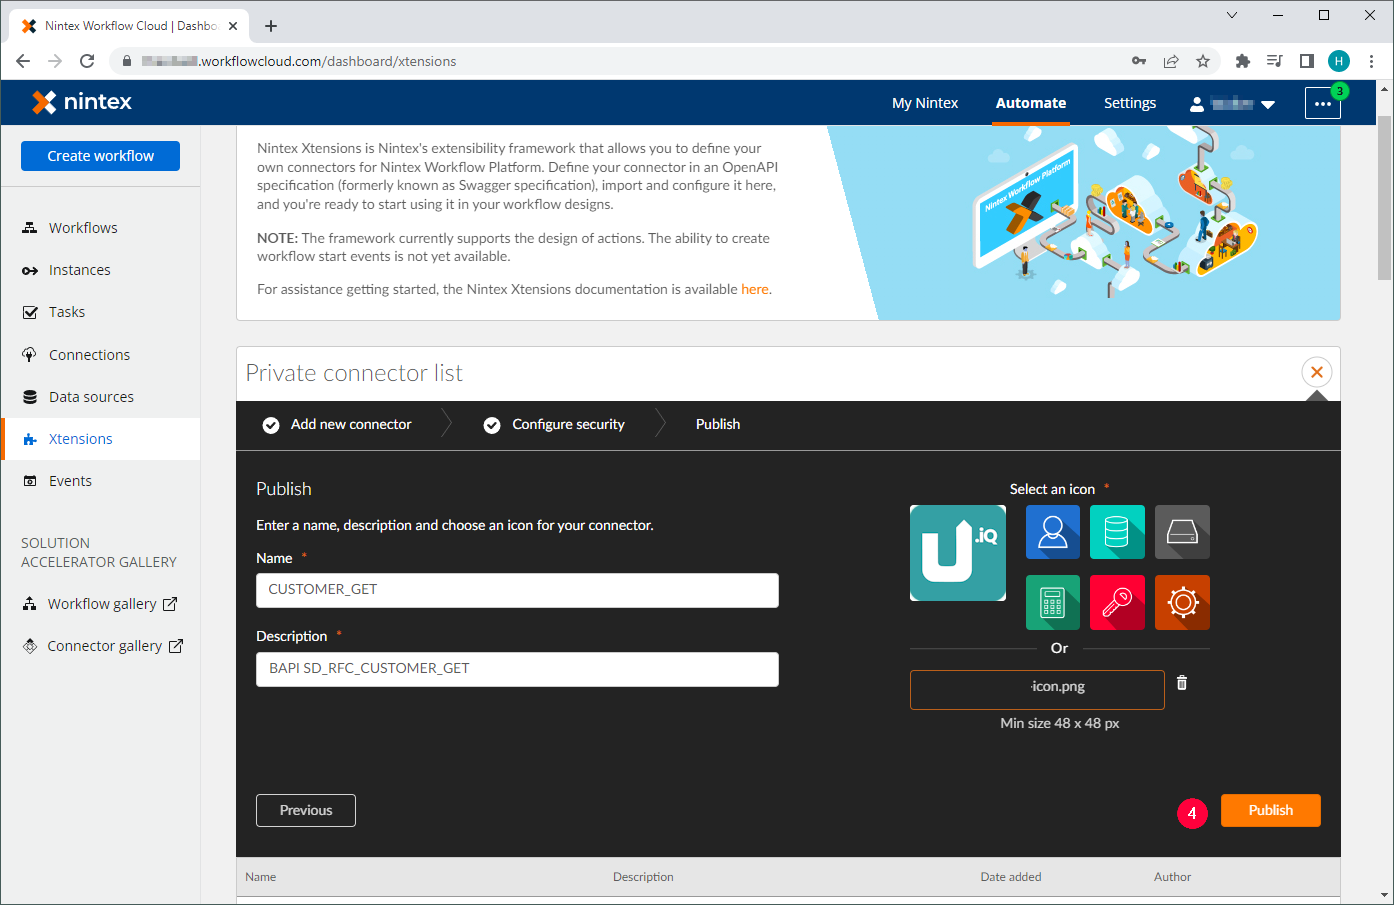
The Xtract Universal.iQ Xtension is now available for use in Nintex workflows.
Use the Xtension in a Nintex Workflow
After an Xtension is created, it can be used in a workflow.
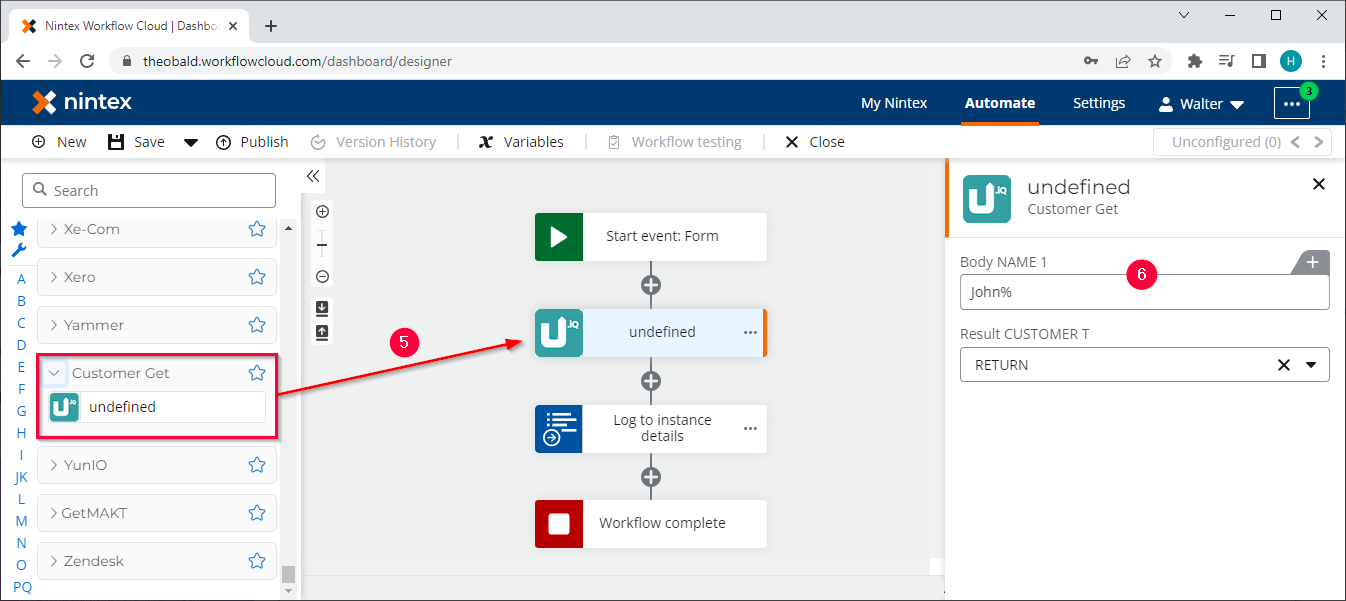
- Drag and drop the Xtract Universal.iQ Xtension from Configure an Xtract Universal.iQ Xtension in Nintex into the workflow .
- Parameterize the input fields .