Integrate a Service via Nintex Gateway
The following article shows how to integrate an Xtract Universal.iQ services via the Nintex Gateway.
The Nintex Gateway is an on-premises application that enables Nintex Automation Cloud to access on-premises resources.
Prerequisites
- Install and configure the Nintex Gateway.
- Make sure that the Nintex Gateway has a valid API key for authentication.
- Install Xtract Universal.iQ version 1.26.3 or higher.
- Set up Basic Authentication in Xtract Universal.iQ, see Documentation: Access Restrictions.
Setup in Xtract Universal.iQ
Before integrating Xtract Universal.iQ with third-party tools:
- Create a service in Xtract Universal.iQ. The depicted example uses the BAPI SD_RFC_CUSTOMER_GET to search and extract customer data from SAP.
- Testrun the service in Xtract Universal.iQ to make sure it works, see Documentation: Run Services in Xtract Universal.iQ.
- Open the Settings menu and set OpenAPI Target to Nintex Gateway. This adds predefined Nintex Gateway properties to the service definition.
- Open the Services menu and click [ Run > Swagger / Open API > Copy URL] to download the service definition.
- Open the service definition and check if the following properties are available at the end of the service definition:
The service definition can now be used to integrate the service with third-party tools.
Configure an Xtension in Nintex
To use Xtract Universal.iQ services in the Nintex Automation Cloud:
- Open your Nintex Automation Cloud tenancy.
- Click Xtensions in the dashboard to open the Xtensions page .
- Click
 in the Private connector list .
 - Click [Choose a file] . Navigate to the Xtract Universal.iQ service definition from Setup in Xtract Universal.iQ.
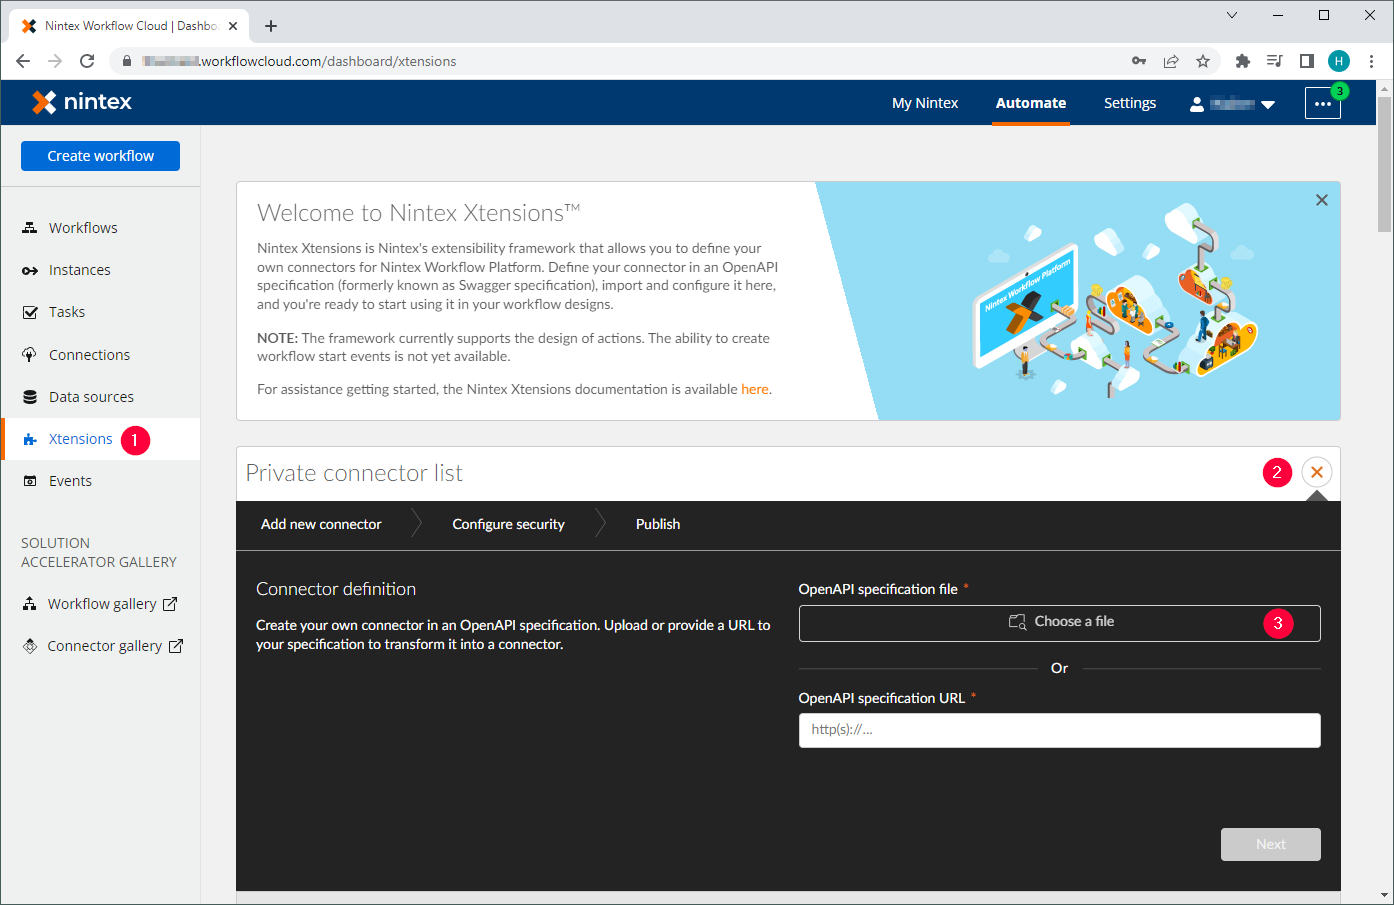
- Wait for the Nintex Automation Cloud to validate the file.
- Click [Next]. Nintex Workflow Cloud detects the basic authentication security template.
- Click [Next].
- Edit the Name of the Xtension. The entered name becomes the name of the action group in the workflow.
- Edit the Description of the Xtension. This appears in the Private connector list in the Xtensions page.
- Optional: select or upload an icon for the Xtension.
- Click [Publish] .
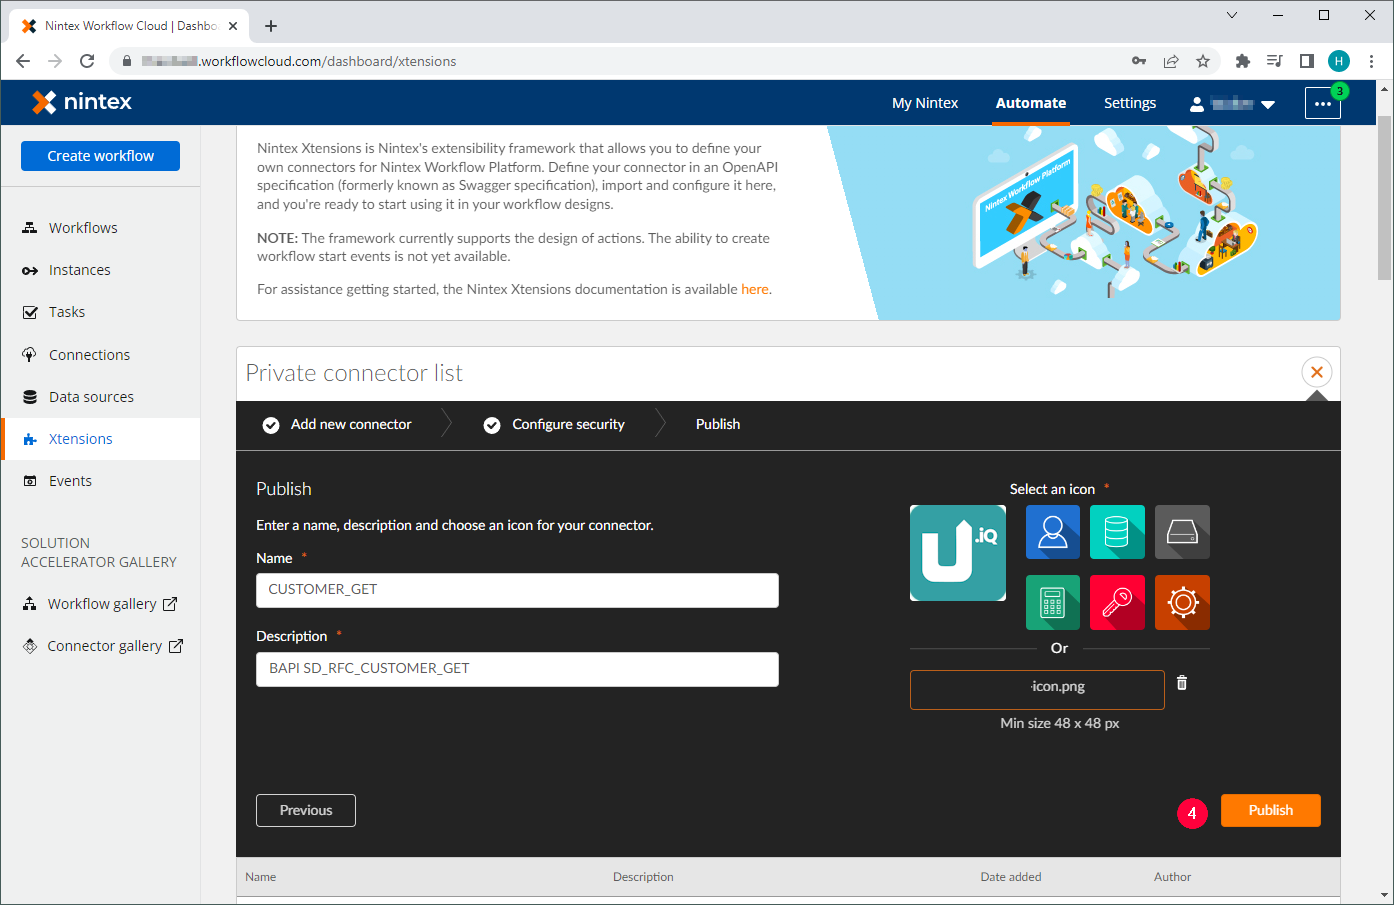
The Xtract Universal.iQ Xtension is now available for use in Nintex workflows.
Configure the Connection in Nintex
To set up a connection to Xtract Universal.iQ via the Nintex Gateway in the Ninex Automation Cloud:
- Click Connections in the dashboard to open the Connections page .
- Click [Add Connection] in the Connector list .
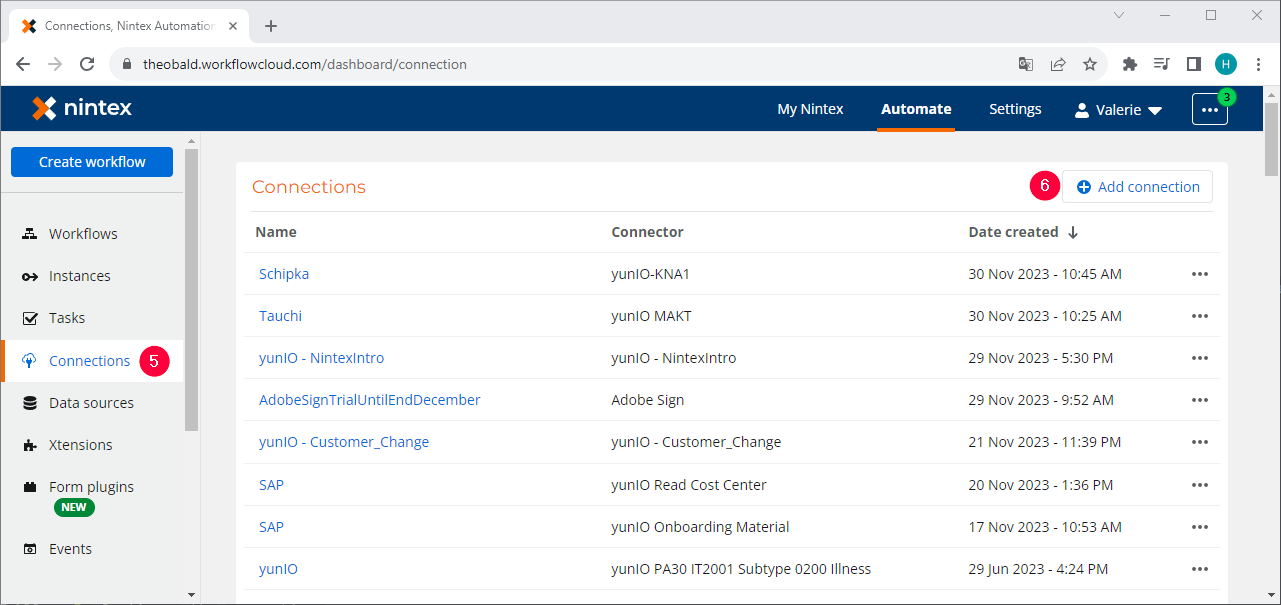
- Select the Xtract Universal.iQ connector from Configure an Xtract Universal.iQ Xtension in Nintex.
- Click [Next].
- Fill in the following connection properties:
- Connection name - enter a name to identify the connection.
- Select Nintex Gateway - select your Nintex Gateway.
- Nintex Gateway API key - enter a valid API key of your Nintex Gateway.
- On-premises service URL - enter the base URL of your Xtract Universal.iQ service, including the HTTPS.
- On-premises application username - enter your Xtract Universal.iQ username.
- On-premises application password - enter your Xtract Universal.iQ password.
- Click [Connect].
The connection to Xtract Universal.iQ via the Nintex Gateway is now set up and can be used in workflows.
Use the Xtract Universal.iQ Service in a Nintex Workflow
After an Xtension and a Connection is created, the Xtract Universal.iQ service can be used in a workflow:
- Drag and drop the Xtract Universal.iQ Xtension from Configure an Xtract Universal.iQ Xtension in Nintex into the workflow .
- Select the connection from Configure an Xtract Universal.iQ Connection in Nintex .
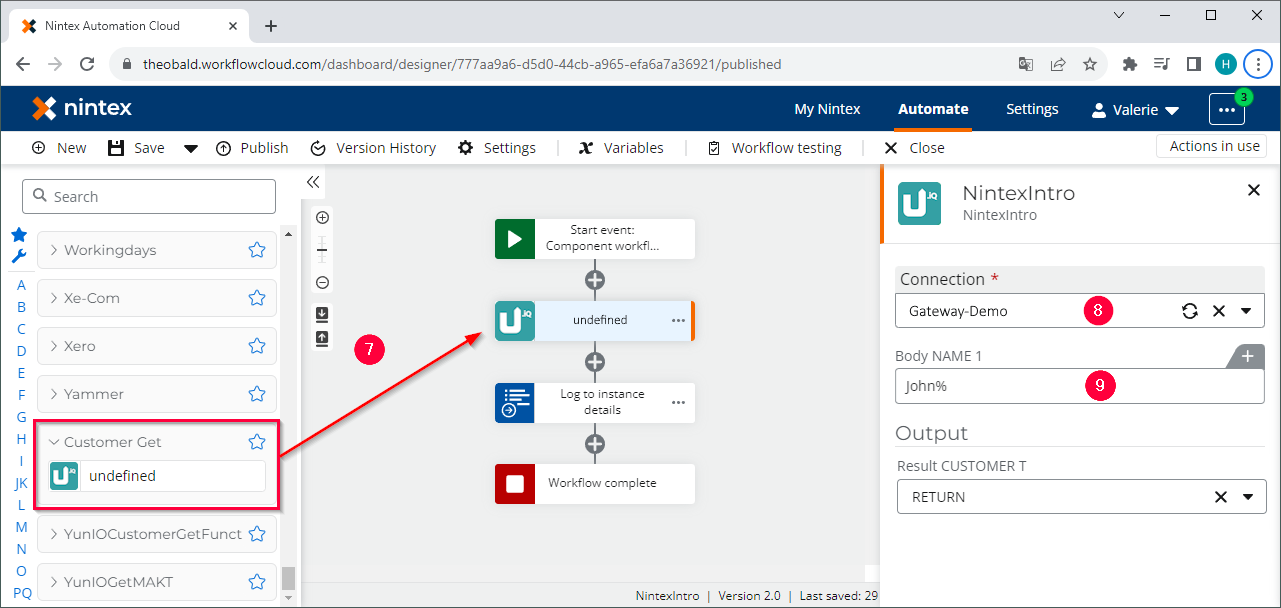
- Parameterize the input fields .
- Run the workflow.
The Xtract Universal.iQ service runs and returns data in the output of the Nintex workflow action.
Related Topics
Written by: Christian Tauchmann, Valerie Schipka