Sync Copilot with SAP using Power Automate and Xtract Universal.iQ
This article shows how to synchronize Microsoft Copilot with SAP.
In this scenario, Xtract Universal.iQ enables a copilot chatbot to query data from SAP without using the Xtract Universal.iQ MCP server. A Power Automate workflow provides the functionality to query the data. It calls an Xtract Universal.iQ service whenever users request the data via the chatbot.
Prerequisites
- Create a new service in Xtract Universal.iQ. The depicted sample uses a service that reads material data from the SAP table MAKT.
- Create a Custom Connector for the service in Power Automate, see Integrate a Service with Power Automate.
Setup in Copilot Studio
To set up Microsoft Copilot with a Power Automate workflow that uses Xtract Universal.iQ services:
- Log into Microsoft Copilot Studio and create a new copilot, see Microsoft Documentation: Create a copilot.
- Open the Actions tab and click [+ Add an action] . The menu "Step 1 of 3: Choose an action" opens.
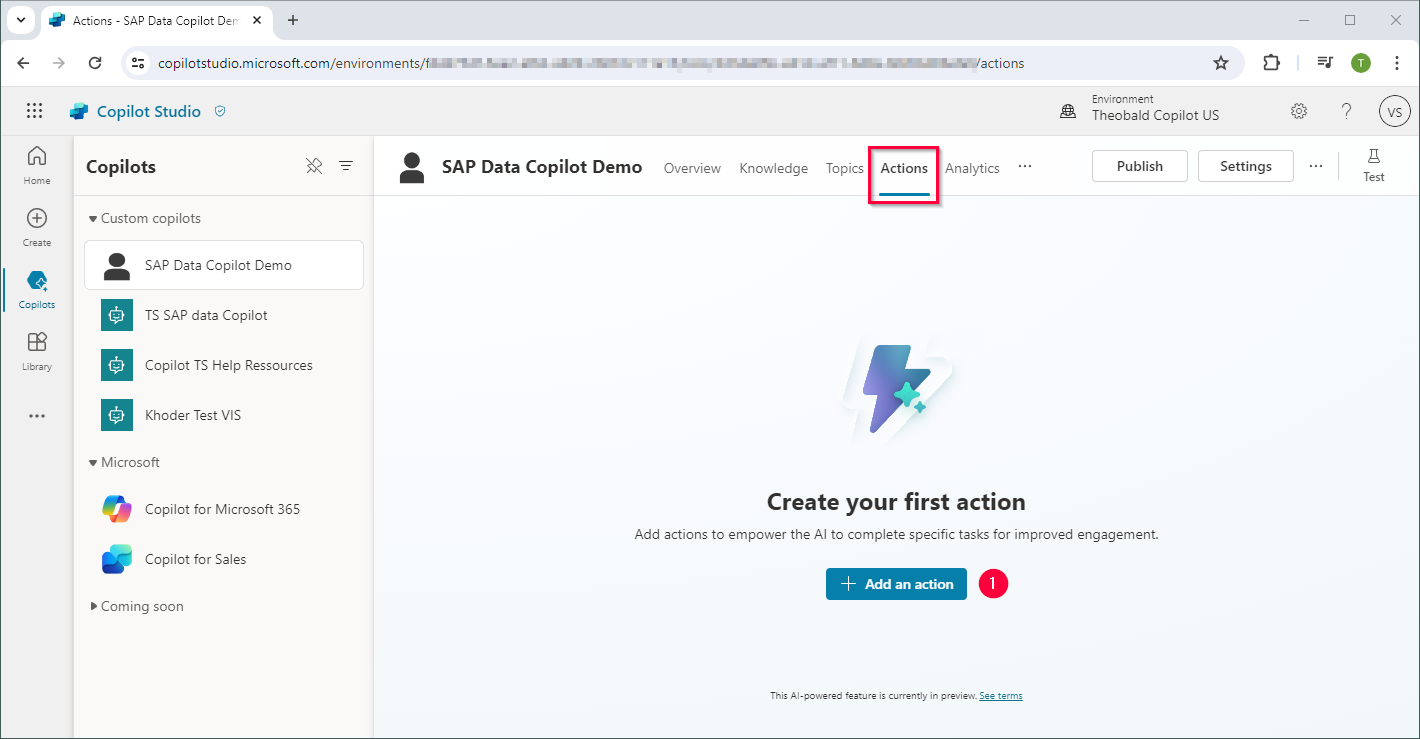
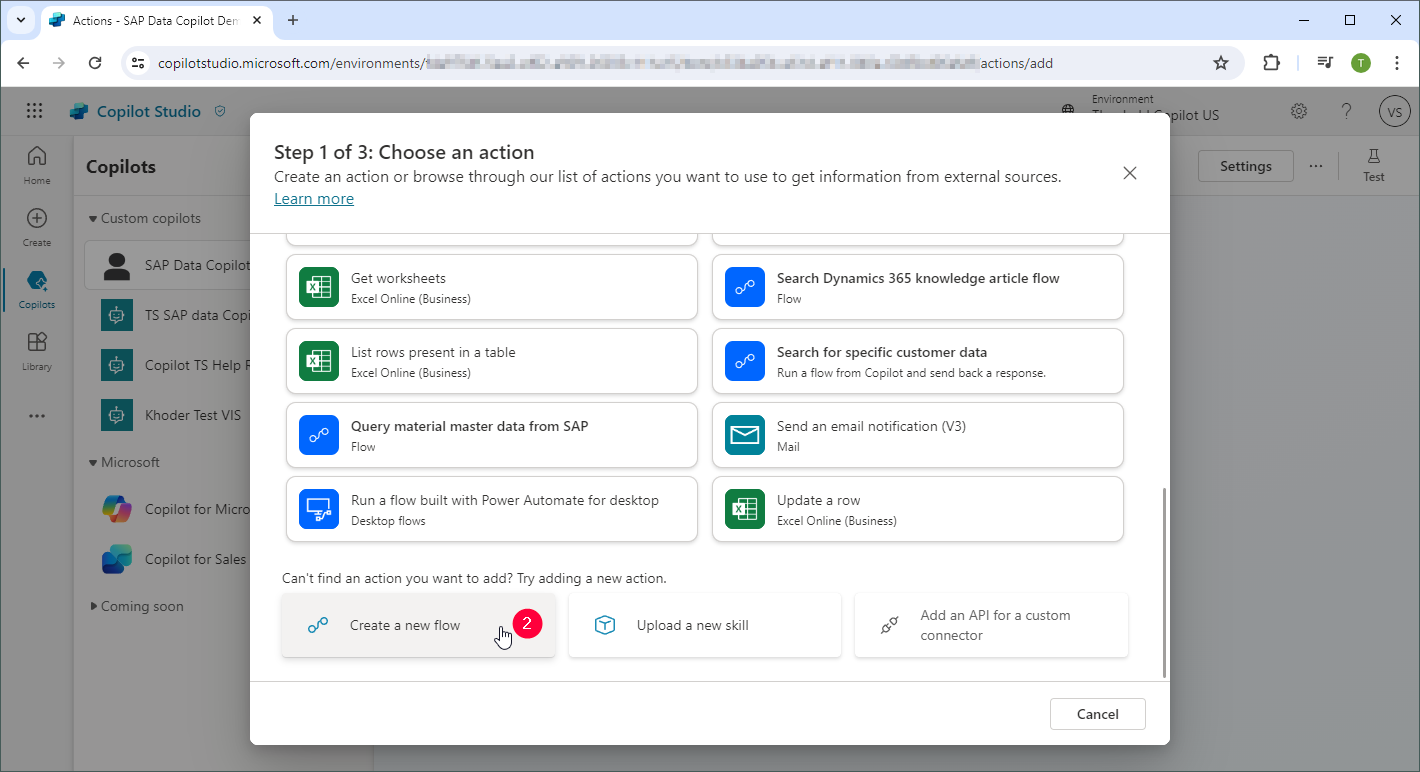
- Click [Create a new flow] . A new browser tab with a Power Automate workflow opens.
-
If your Xtract Universal.iQ service requires input parameters, create the parameters in the Run a flow from copilot trigger action.
Note
Input parameters are required when using an Xtract Universal.iQ service to write data to SAP. In this case, make sure to assign the input parameters correctly in the Power Automate workflow.
-
Add an Xtract Universal.iQ Custom Connector to the workflow , see Integrate a Service with Power Automate.
Alternatively, add an HTTP action that triggers your Xtract Universal.iQ service.
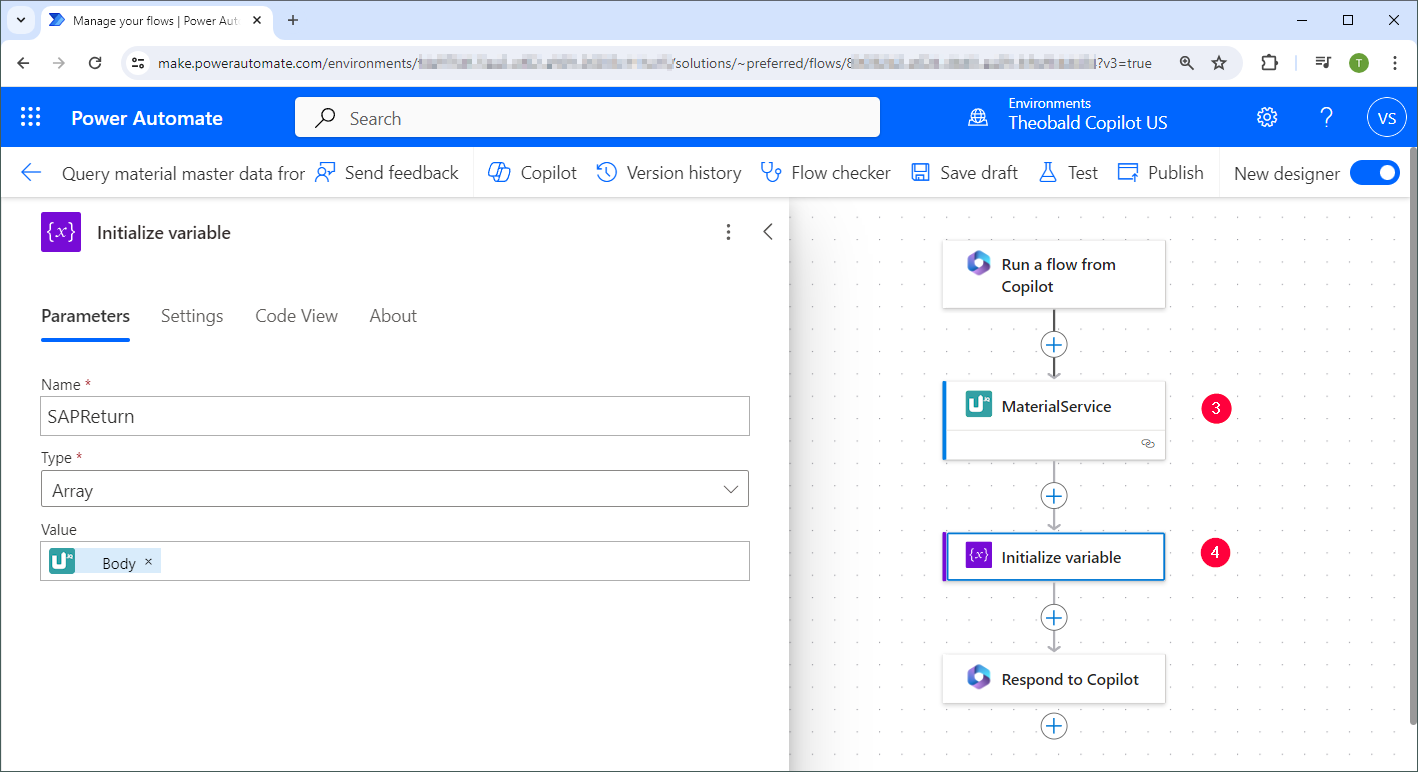
- If the Xtract Universal.iQ service returns data that is not a string, add an Initialize variable action to assign the correct data type . The depicted example returns multiple items in an array.
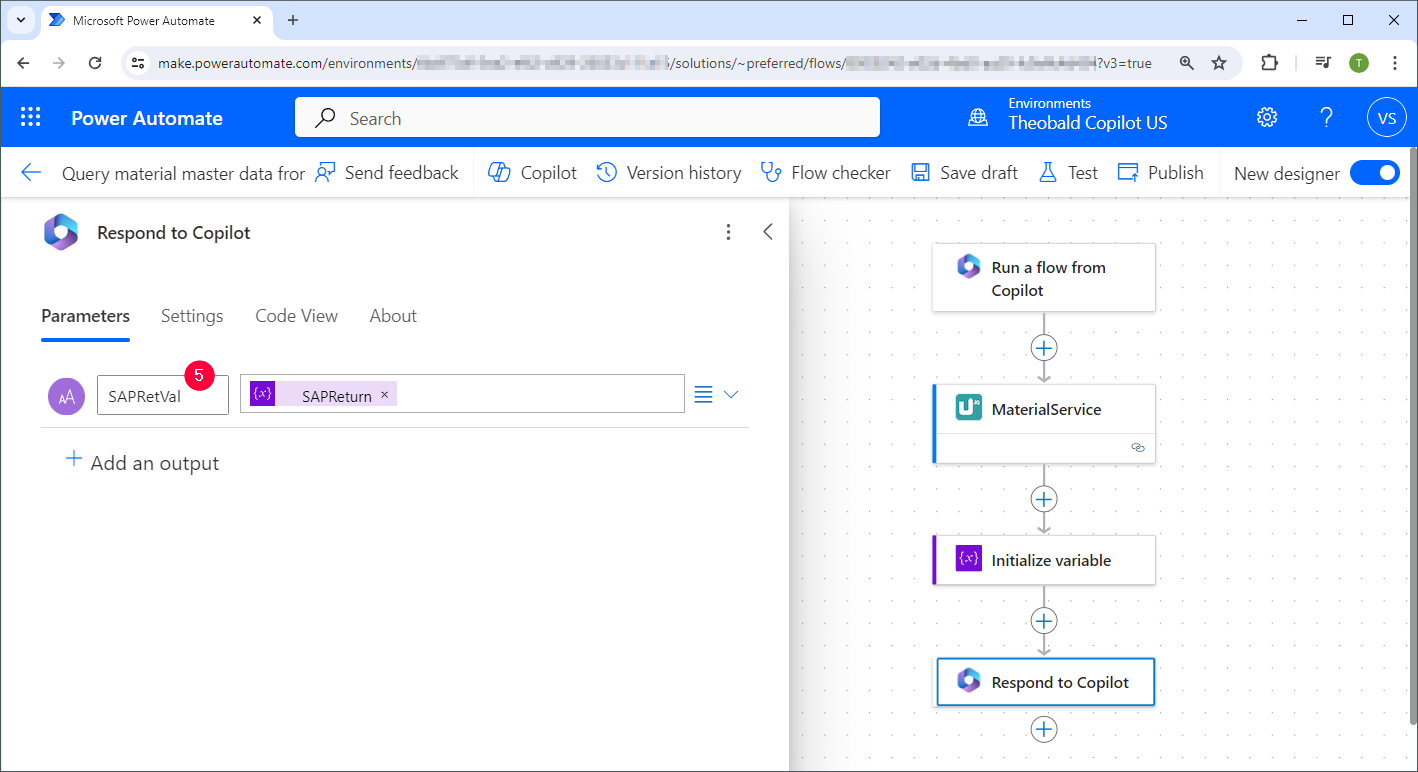
- Add the SAP data as an output parameter to the Respond to Copilot action .
- Save the workflow.
- Go back to Copilot Studio and click [Refresh]. The workflow is now available in the list of actions.
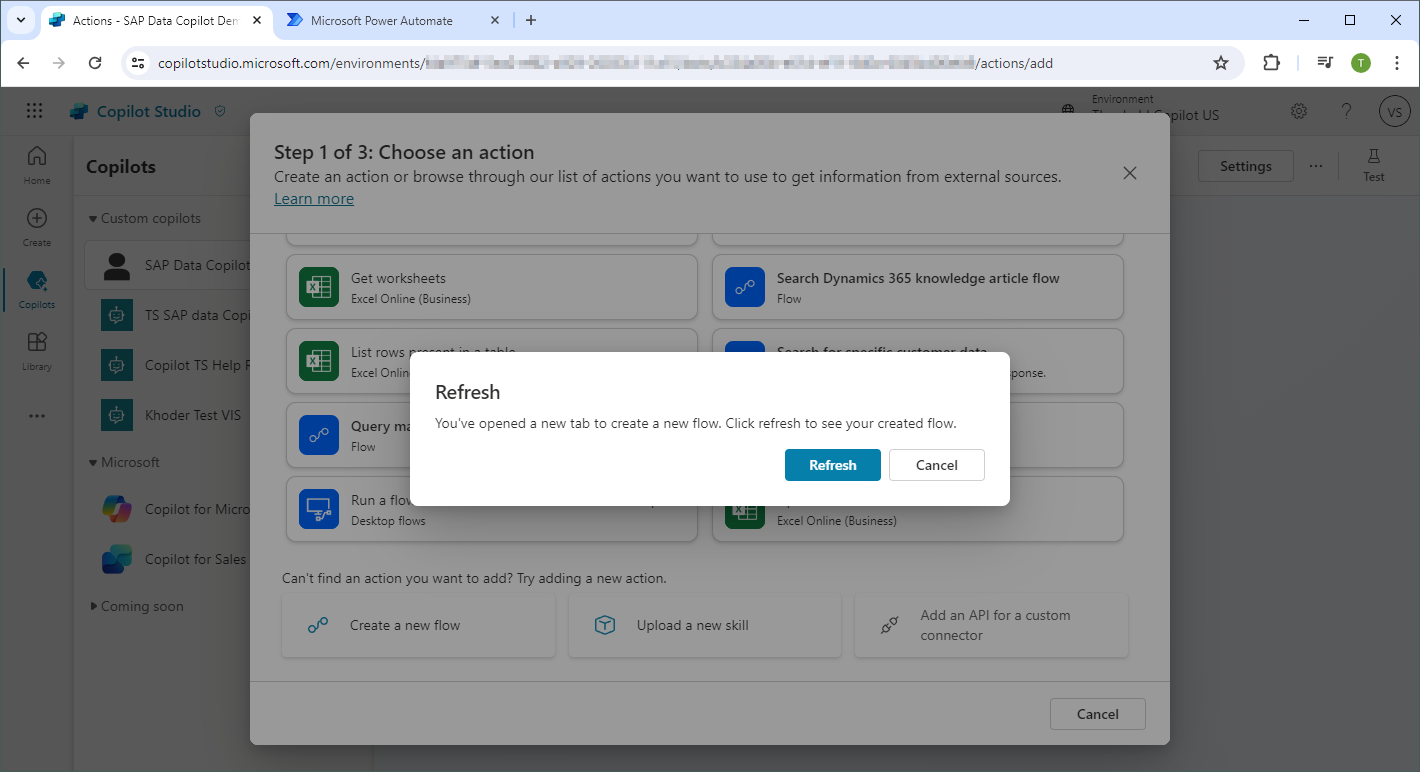
- Select the workflow. The menu "Step 1 of 3: Choose an action" opens.
- Click [Next]. The menu "Step 2 of 3: Review inputs and outputs" opens.
- Click [Next]. The menu "Step 3 of 3: Review and finish" opens.
- In the section Configure, click [Edit] to change the name and description of the action. Copilot selects and runs the action based on the name and description.
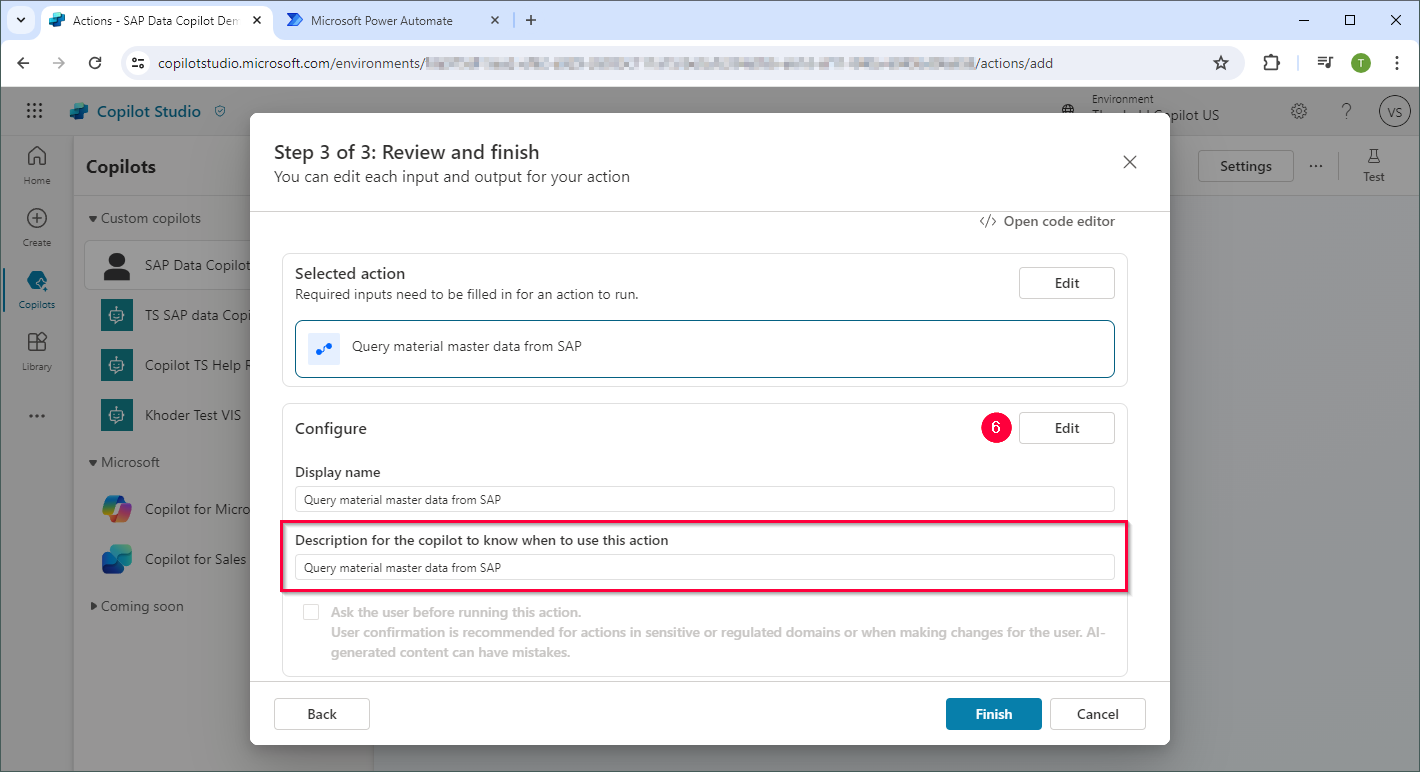
- Click [Finish].
- Navigate to [Settings] > Generative AI and select Generative (preview).
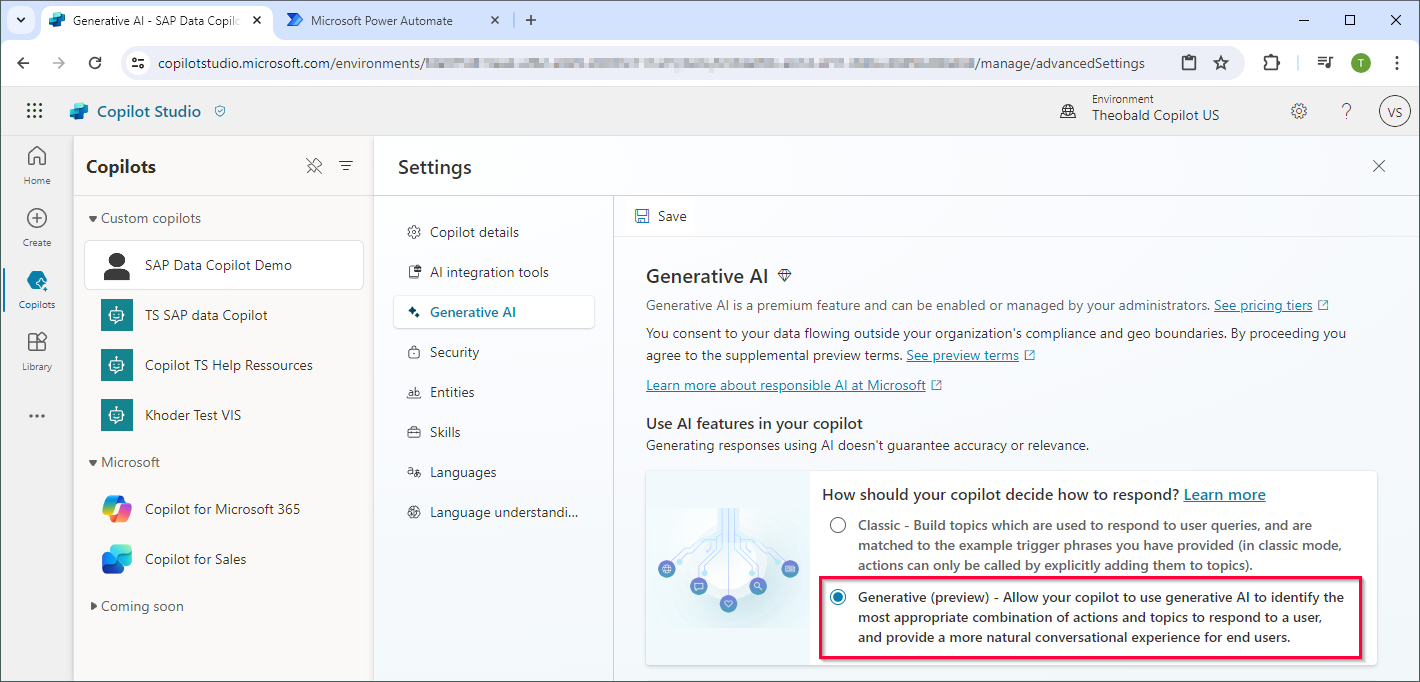
- Click [Save].
- Test the copilot chatbot in Copilot Studio.
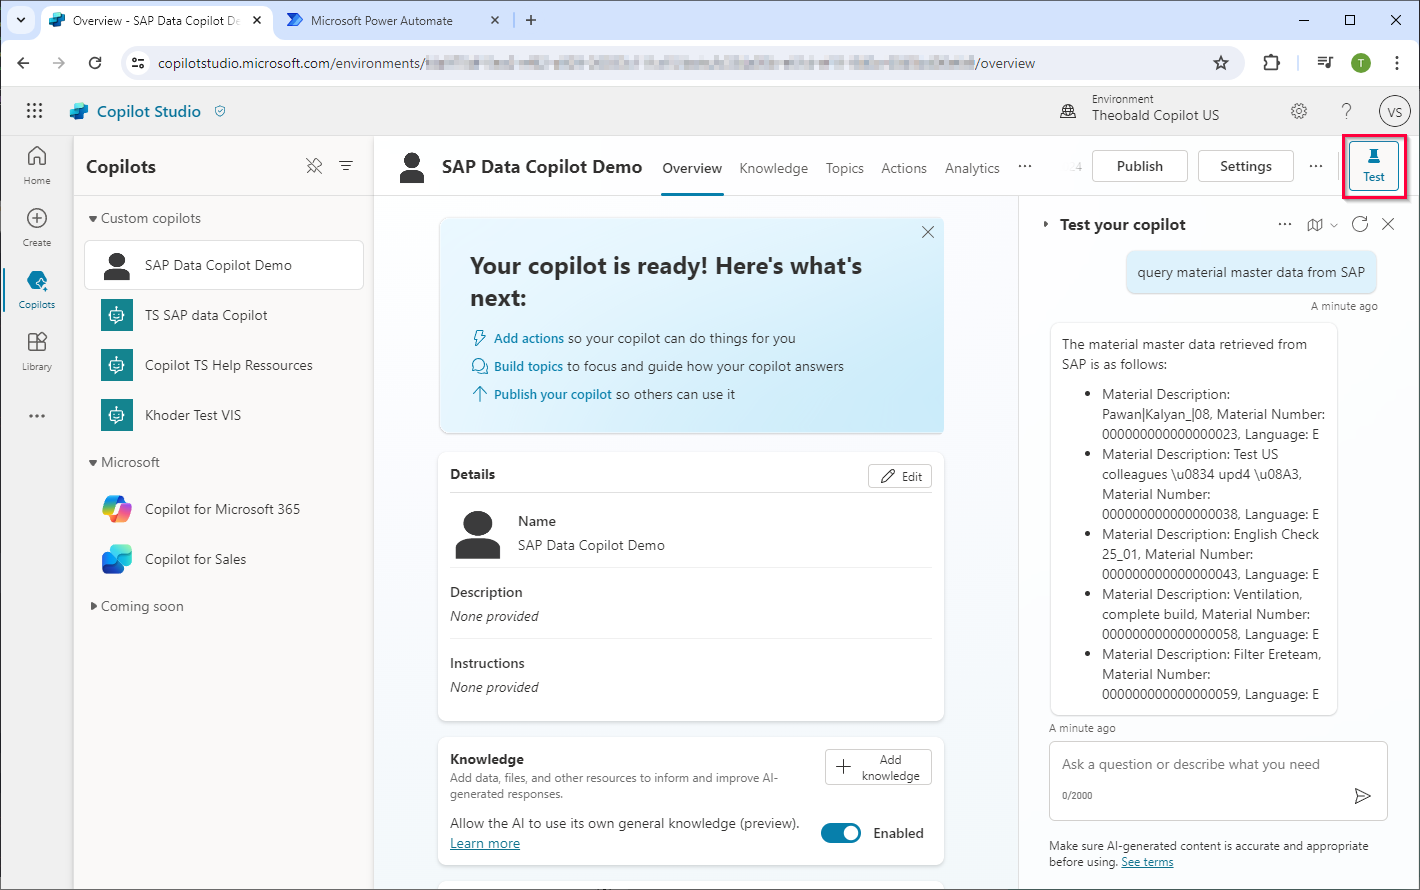
Copilot is now configured.
You can equip the copilot with copilot topics to add trigger phrases and more context to the copilot action. For more information, see Microsoft Documentation: Call a flow from a topic.
Note
The number of characters returned by the Power Automate workflow may be limited. This will be improved upon in the future.
Related Topics
- Microsoft Documentation: Create a flow to use with copilot
- Microsoft Documentation: Orchestrate copilot topics and actions with generative AI (preview)
- Microsoft Documentation: Publish your copilot.
Written by: Christian Tauchmann, Valerie Schipka